- Premiere Tutotial
How to Use Color Correction in Premiere Pro and FilmoraPro

Dec 30,2019• Proven solutions
So, you’ve shot an amazing video that is rich in colorful scenes but are not much satisfied with the lighting or color output of the video. Well, in such a case you can use Premiere Pro to achieve cutting edge color correction.
Not familiar with how to make use of Premiere? Fret not pal! We also have discussed below the step by step tutorial on how to perform color correction on Premiere Pro.
Keep reading further and explore yourself how easy is to perform color correction in Premiere Pro. In the end, we will also give you an alternative to Premiere to make color correction.
- Part 1: Difference between color correction and color grading
- Part 2: How to Correct Color in Premiere Pro
- Part 3: How to Use Fast Color Correction in Premiere Pro
- Part 4: Basic Color Correction Tool in Premiere Pro
- Part 5: How to Use Color Correction in FilmoraPro
You may also like: Best Color Grading/Correction Tools
Part 1: The Difference between Color Correction and Color Grading
Before we get hands on experience of both Premiere Pro and FilmoraPro, it is vital to understand the key difference between color correction and color grading. Often, both terms are confused with each other. So here’s the exact piece of information for your convenience.
1. Color Correction
Color Correction is nothing but the process of customizing the exposure, shadows and contrast to redefine the overall look of the scene /image to give it a real like look. This balancing of light plays a huge role in setting the right look of the image/scene to make it more appealing and real life like.
2. Color Grading
Ideally, Color Grading is carried out after color correction is done. It is performed to alter the visual tone of a scene/image. For instance, the green tint obtained in the movie “The Matrix” is a result of color grading. Not just in “The Matrix”, there are several other blockbuster movies in Hollywood that make use of an orange and teal grade. Color grading is more of an artistic skill with technical aptness.
Part 2: How to Correct Color in Premiere Pro
To get started with color correction in Premiere Pro, first you need to have a workspace. Set it up and ensure, by any chance, you can connect calibrated NTSC or PAL monitor to your PC. Then simply move along with the instructions mentioned below to achieve color correction in Premiere Pro.
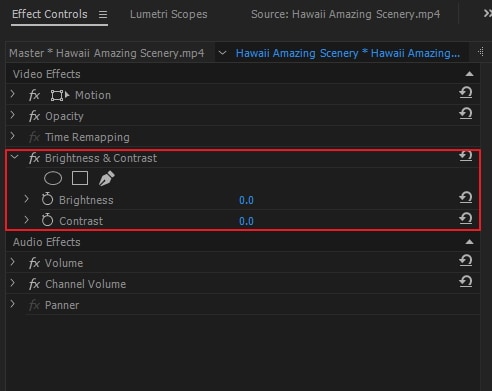
- Go to color correction effect: Begin with applying any of your desired “Color Correction” effects to your video clip available in the “Timeline” panel. Alternatively, if your video clip is already selected, you can simply drag drop the preferred effect to the Video Effects section available in the Effects Control Panel. Head towards the Color Correction effect available in the Effects panel.
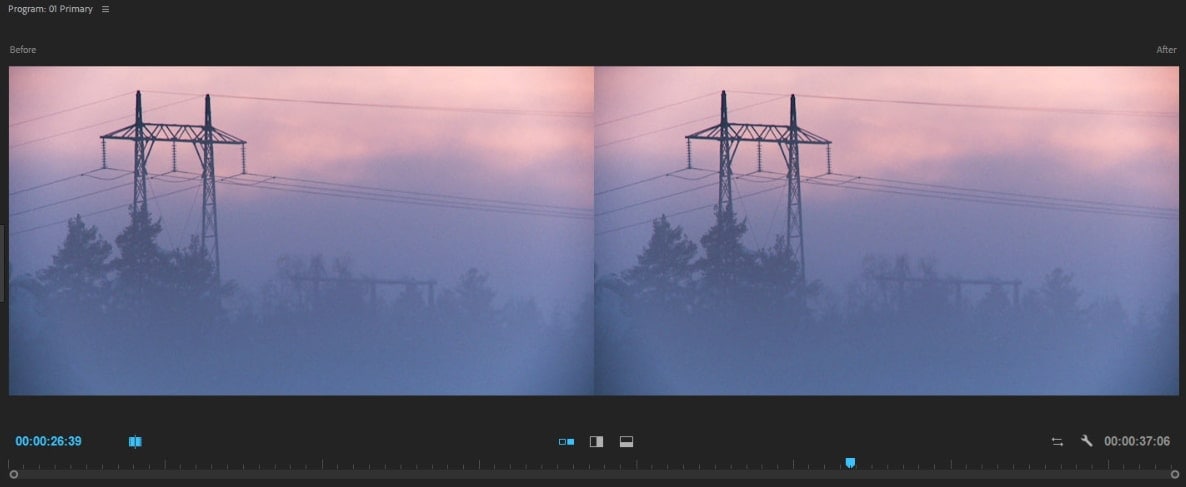
- Change color in frames: Then, you need to adjust the current-time indicator exactly to that particular frame offers exposure of the colors which are required to be color corrected. While performing color correction in Premiere Pro or any other software, it is vital to have preview panel as well. So, in order to set it up: You need to opt for the “Show Split View” version to bring up the “Before & After” view of your Video clip within a single monitor screen.
- Ajust midtone, highlight and shadow areas: You can make use of the control labeled as Tonal Range Definition to adjust the midtone, highlight and shadow areas. Make use of either Eyedropper tool or Secondary Color Correction controls. For your information, every Color Correction effects also have the “Secondary Color Correction” controls panel in order to rectify the exposure of any particular color or range of colors.
Note: Just in case, you wish to change the orientation of the split view from “Horizontal to Vertical” or vice versa, head to the “Layout” menu and then make due changes in the relative proportions, as per your preference, of the split views.
Note: Secondary Color Correction controls aren’t available for the Video Limiter and Fast Color Corrector effects.
Part 3: How to Use Fast Color Correction in Premiere Pro
Moving on to the “Fast Color Correction in Premiere Pro”, let’s now understand a step by step tutorial on how to make use of it to set the white balance. This method is widely recommended over the “Auto Color” effect as it lets you to have more control over the effect.
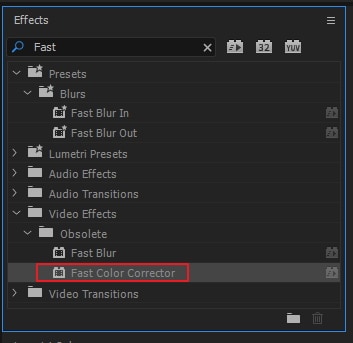
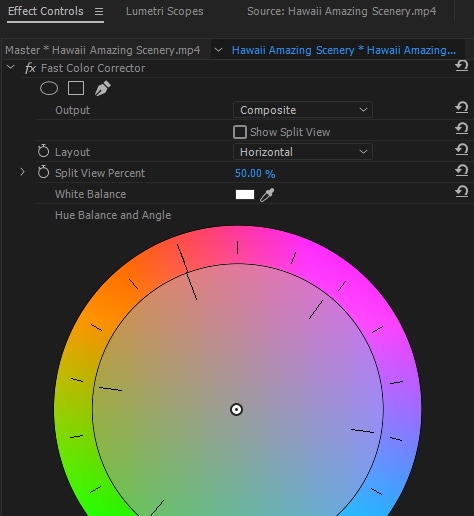
- Make use of Fast Color Corrector effect: Head to the “Effects/Preset” section in the Premiere Pro and then, simply drag drop the Fast Color Corrector effect over your footage/image in order to apply it.
- Opt for the White Portion in your footage: Select the “Eyedropper” tool and then opt for any white area over your footage. Usually, a white sky or white clothing is the best selection for the sample.
- Perform the desired customizations: Once you’re done with customizing white balance area of your footage, it should be pretty close to balanced. However, depending upon your requirement, you may need to make some slight adjustments to set it just right.
Note: Please bear in mind that if, in case, the white areas over your footage are too blown out, there ain’t going to be much color detail available to utilize the Fast Color Corrector effect.
Part 4: Basic Color Correction Tool in Premiere Pro
Well, to help you understand the in and outs of the basic color correction in Premiere Pro, carefully read through the entire section discussed below.
Pro Tip: In case you wish to reset any value in the Lumetri Color Panel to its default value, simply double tap on the slider and you’re done.
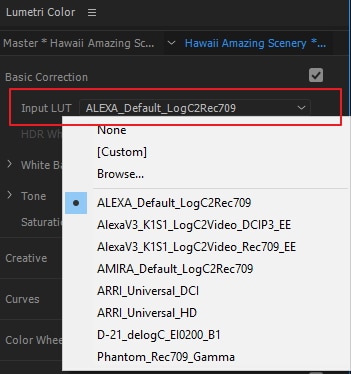
1. Input LUT
The very first control which is more like that of Instagram filters is Input LUT. If you’re learning basics or a novice, it isn’t really required to make use of LUTs. Making use of this will add more trouble than be of any help.
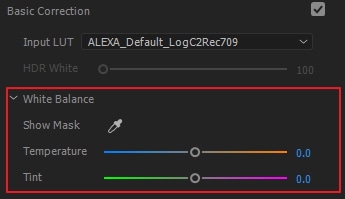
2. White Balance
Right after Input LUT, you’ll get to see White Balance with which you can customize the temperature and tint. Drag the “Temperature” slider towards left and it will add more blue color to the scene/image which will levy a “Cooler” appearance of the things. And if you drag it towards the right, adds more orange color and imposes a “Warmer” appearance of the things.
When you make use of the WB selector, you’re enabled to select any point in your footage that is white. Once you do that, Premiere Pro will fetch the appropriate white balance settings from it.
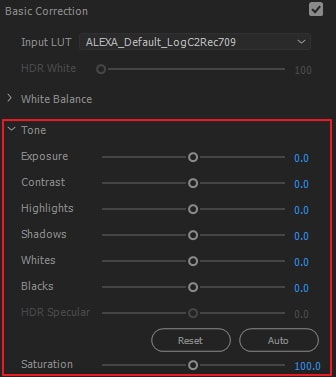
3. Tone
Next, we have tone section that helps you to control various effects like exposure, contrast, highlights, shadows, whites, blacks and HDR Specular. If you’re not well-versed with all the effects, you can always look forward to the “Auto” button available at the bottom right of the “Basic Correction” panel. Thought, this doesn’t always perform an outstanding makeover but yes, it can certainly be of great help if you’re a novice.
With the launch of new Premiere Pro, the “Exposure” and “Whites” sliders were improved much. While on the other hand, to all the other sliders, there are some minor reductions.
- Exposure: you can either brighten or darken the scene/image.
- Contrast: increase or decrease the contrast.
- Highlights: makes increment or decrement in the highlights.
- Shadows: to add or remove the shadows only.
- Whites: controls the extremity of white pixels by increasing or decreasing its intensity.
- Blacks: controls the extremity of black pixels by increasing or decreasing its intensity.
- HDR Specular: you won’t be able to make use of this until you’re working with a high dynamic range (HDR) footage.
Note: For all the aforementioned sliders, when you drag it towards the right, it will amplify or increase the intensity of the effect. While, dragging it towards the left will diminish or decrease the intensity of the respective effect.
4. Saturation
Lastly, the saturation control helps you to customize the extremity of the colors in your scene or image. Drag it all the way towards left, your image or scene will turn black and white. If you drag it all the way towards right, your scene or image will turn saturated. In other words, colors will give more of an unrealistic and fake outlook.
Part 5: How to Use Color Correction in FilmoraPro
FilmoraPro is a video editor that can make color correction a lot easier than Premiere Pro. Likewise Premiere Pro, first thing you need to get started is to set up a workspace for color correction. If you’re a pro you can still manage work easy with the default layout, but for novice users it is recommended to get a optimal layout set up for easy operation of color correction or color grading. Here is the user guide of FilmoraPro that may help you. To get this done, you can simply head to the “View” menu at the top, followed by “Workspaces” and opt for Color. You’re all set to begin now. Simply move along with the instructions mentioned below to achieve color correction in FilmoraPro.


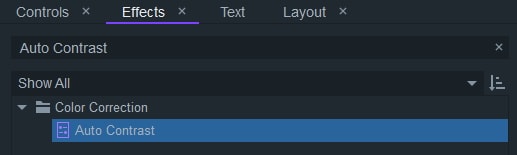
1. Use Auto Contrast
Now, here’s a hypothetical situation where we have a footage that is missing a lot of contrast and the shot’s white balance is way too blue. In such a scenario, you can set the contrast with the help of Auto Contrast feature (steps listed below) or using Curves (discussed in the next point).
Begin with selecting the footage you wish to set contrast of, over the “Timeline” and then proceed to “Controls” section available on the top left. Now, you’ll get to see “Effects” section placed just below the “Transform” properties. Hit the “+” icon besides “Effects”, get down to “Color Correction” and then opt for “Auto Contrast”. You’re done now.
Also, to set the temperature of the footage, follow the instructions below.
- Push the “+” icon next to “Effects” again and get down to “Color Correction”. Now, opt for “Color Temperature”.
- Then, you need to hit the “triangle” (pointing towards right) besides the “Color Temperature” effect to expand the secondary controls of the panel. Now, drag the “Temperature” slider as per the requirement.
Do you know: Changing the order of the effects can also help you to achieve a more color corrected and real life-like colors.
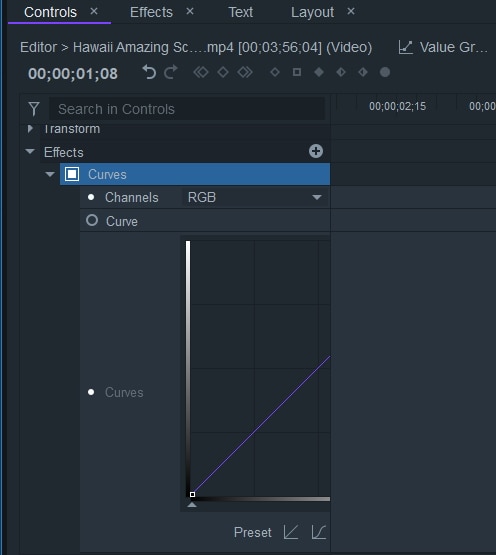
2. Use Curve effect to Correct Color
Next up, we have is to color correct a footage using the Curves effect. Let’s understand how to make use of this effect.
- Start by tapping the “+” icon next to “Effects”, then “Color Correction” and finally, opt for “Curves”.
- Then, you need to hit the “triangle” (pointing towards right) besides the “Curves” effect to expand the secondary controls of it.
- Now, you can make use of the graph curve to add the contrast to your footage. For instace, we made the curve in bit of an “S” shape to achieve it.
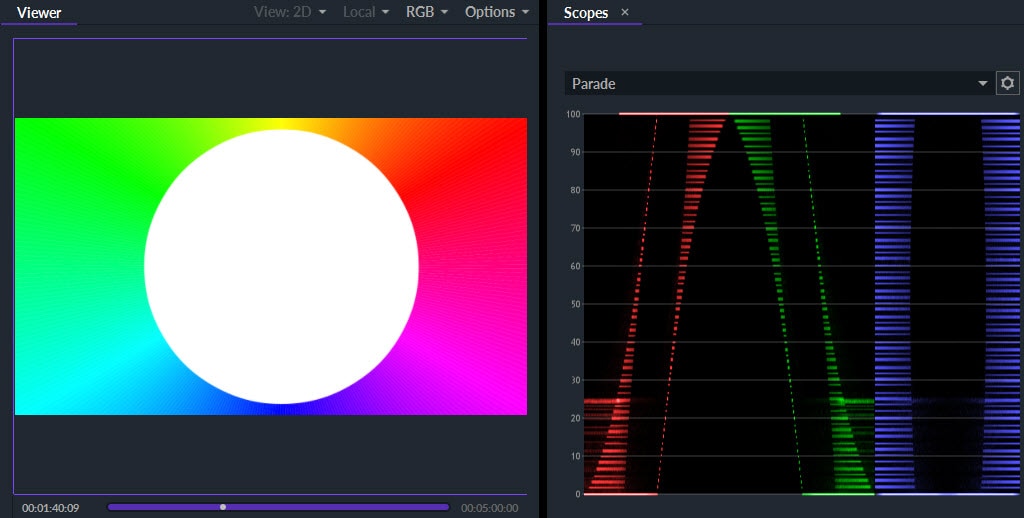
3. Use Scopes in FilmoraPro
The “Curve” effect or the “Auto Contrast” features are a quick and easy way to color correct your footage. But for the professional users, FilmoraPro also has a great method to color correct your footage and that is via the “Scopes”. To utilize this method, you need to look out for the “Scopes” tab on the top right corner and then you’ll get to access several different scopes types.
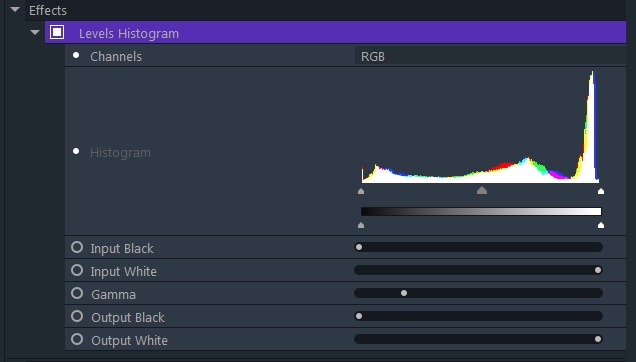
- Histogram: The Histogram graph shows the amount of pixels ranging with different brightness values in that particular scene or image. In a Histogram readout, the vertical axis or height of the graph displays the strength of the pixels, while the horizontal axis displays the pure black range on the left and the pure white range displayed on the right.
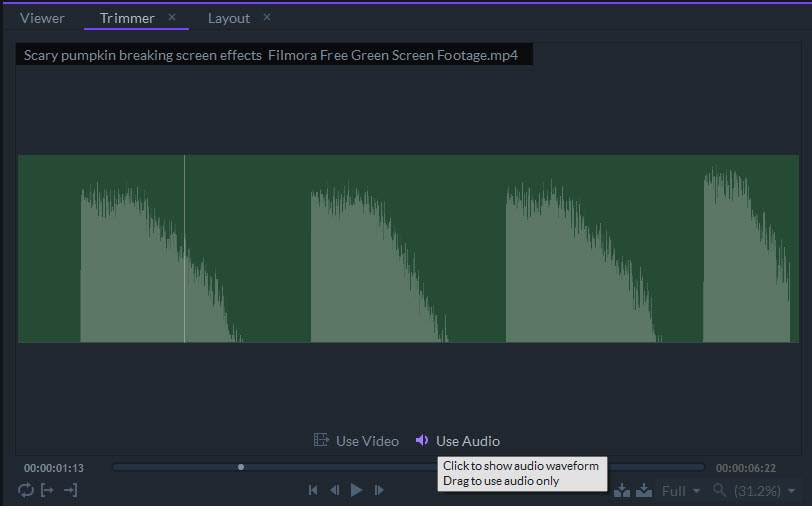
- Waveform: When it comes to monitor brightness values of the current frame, Waveform chart is certainly be of help. The Waveform readout’s left to right axis represents the scene/image/frame from left to right. Therefore, the image color values of the left side will be displayed over the scope’s left side. Likewise, the readout’s down to up axis displays the intensity of the Luma values in the particular area of the frame. You can make use of the “Curves” effect to make necessary changes in it.
- Parade: Next is the Parade readout. Likewise Waveform, the Parade scope displays the brightness values but each color channel (Red, Green, Blue) is individually displayed in sequence, one after the other. Now, if you wish to change the values of the color channels individually, resort back to the “Curves” effect and instead of going straight to adjusting the curve, this time choose the preferred color channel from the drop down next to “Channels” and then proceed with adjusting the curve as per your need.
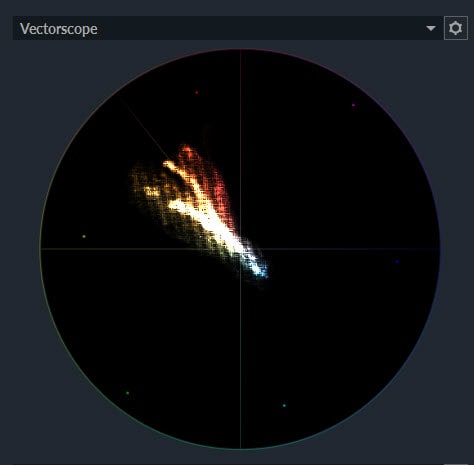
- Vectorscope: Unlike Histogram, Parade or Waveform which specifically concentrates about brightness values, Vectorscope is more about the colors displayed in your scene or image. You’ll get to see the “Color Wheel” here, where the center of the wheel renders the whites and grays, while the extreme edges of the wheel renders the very saturated colors. In other words, it constitutes the hue and saturation data of the current frame. The color intensity rendered with the dots of light and the very noticeable diagonal line renders the skin tone which makes it way more easier for you to color correct your footage and achieve an appropriate color. Just in case, if you’re having trouble seeing the dots, hit the “Gear” icon on top right and drag the “Brightness” slider towards the right.
Final Words
So, that was all about performing color correction in Premiere Pro and Filmora Pro. With such classified information for both the software, it is now pretty evident they both are efficient and productive tools. But on one hand, Premiere Pro requires high technical skills and sound knowledge about the tools. On the other, Filmora Pro is turned out to be a savior as it can be utilized by users of all skill levels, be it a novice or a pro.
Bring up your video to a professional level with straightforward tools.
Try It Free Try It Free
Benjamin Arango
staff Editor
0 Comment(s)